How to project a flat face texture onto a 3D head mesh in Blender
I need this for myself. I'll be doing this process a lot so I want it written down and easy to follow multiple times. It's based off this video, but it'll save me having to jump around the video when repeating this:
Step 1: Get assets
I am using this for the 3D asset. Specifically the most detailed head. I wanted it to have a slightly blocky feel to it: https://sketchfab.com/3d-models/head-base-mesh-6f4b04475edb4d478bbf930f8b1c315e
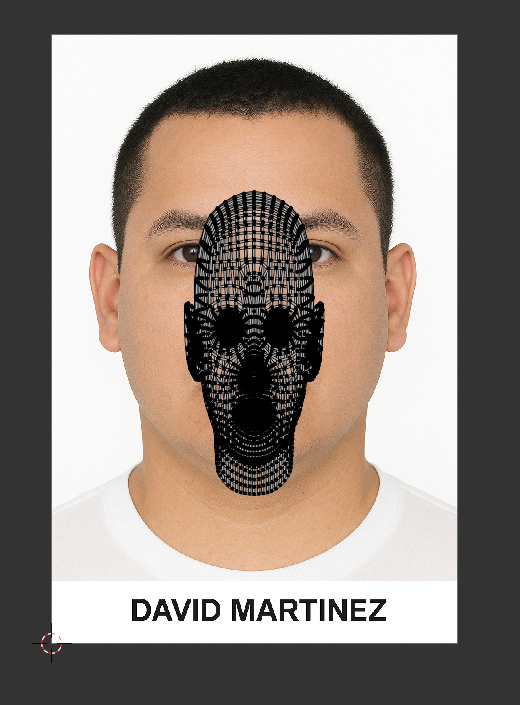
Use ChatGPT to generate the front and side textures. These are the prompts I used. I used AI to create the prompts too and I asked it to "add the person's ethnicity based off the name".
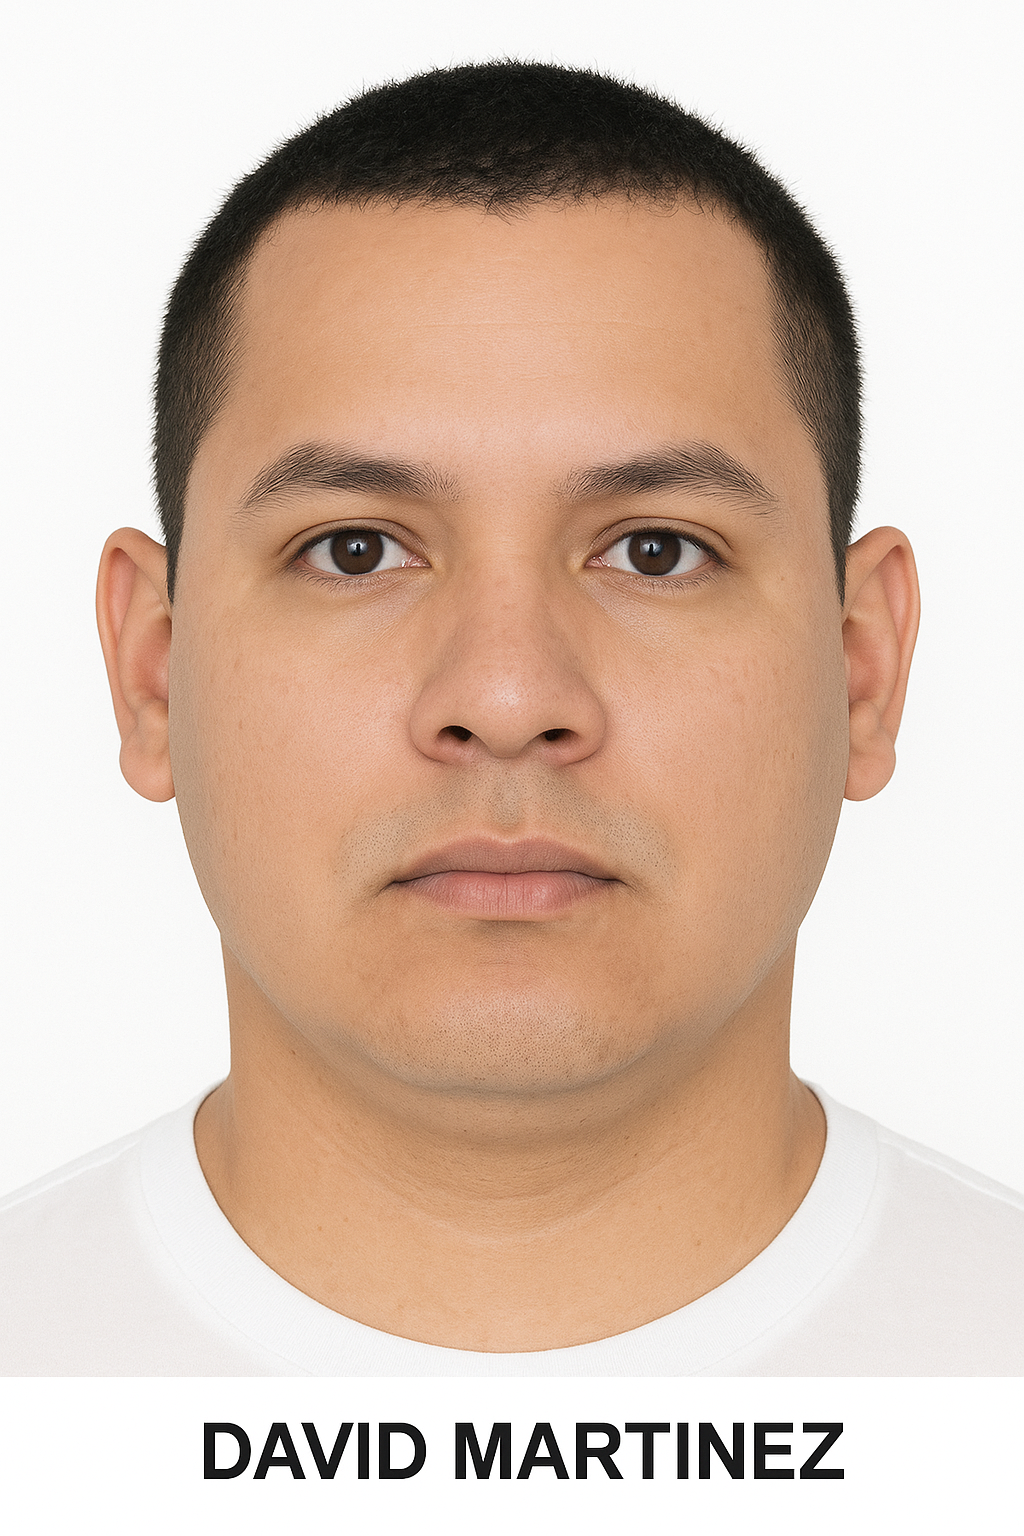
Portrait of a Latino man in his thirties named David Martinez, face in direct frontal view, looking straight into the camera. Head-only composition with the entire head visible from top to bottom. CRITICAL: Absolutely flat lighting with no dimensional modelling whatsoever - the face should appear almost graphic or illustration-like with uniform brightness across every surface. No shadows under nose, chin, cheekbones, or neck. No highlights on forehead or cheeks. Front-lit with multiple diffused light sources from all angles creating zero contrast. The entire face should have the same luminosity as if it's a flat surface facing the camera directly. Sharp focus throughout. Neutral expression, perfectly centred framing, plain white background. Clinical, forensic photography style with completely even exposure across all features.
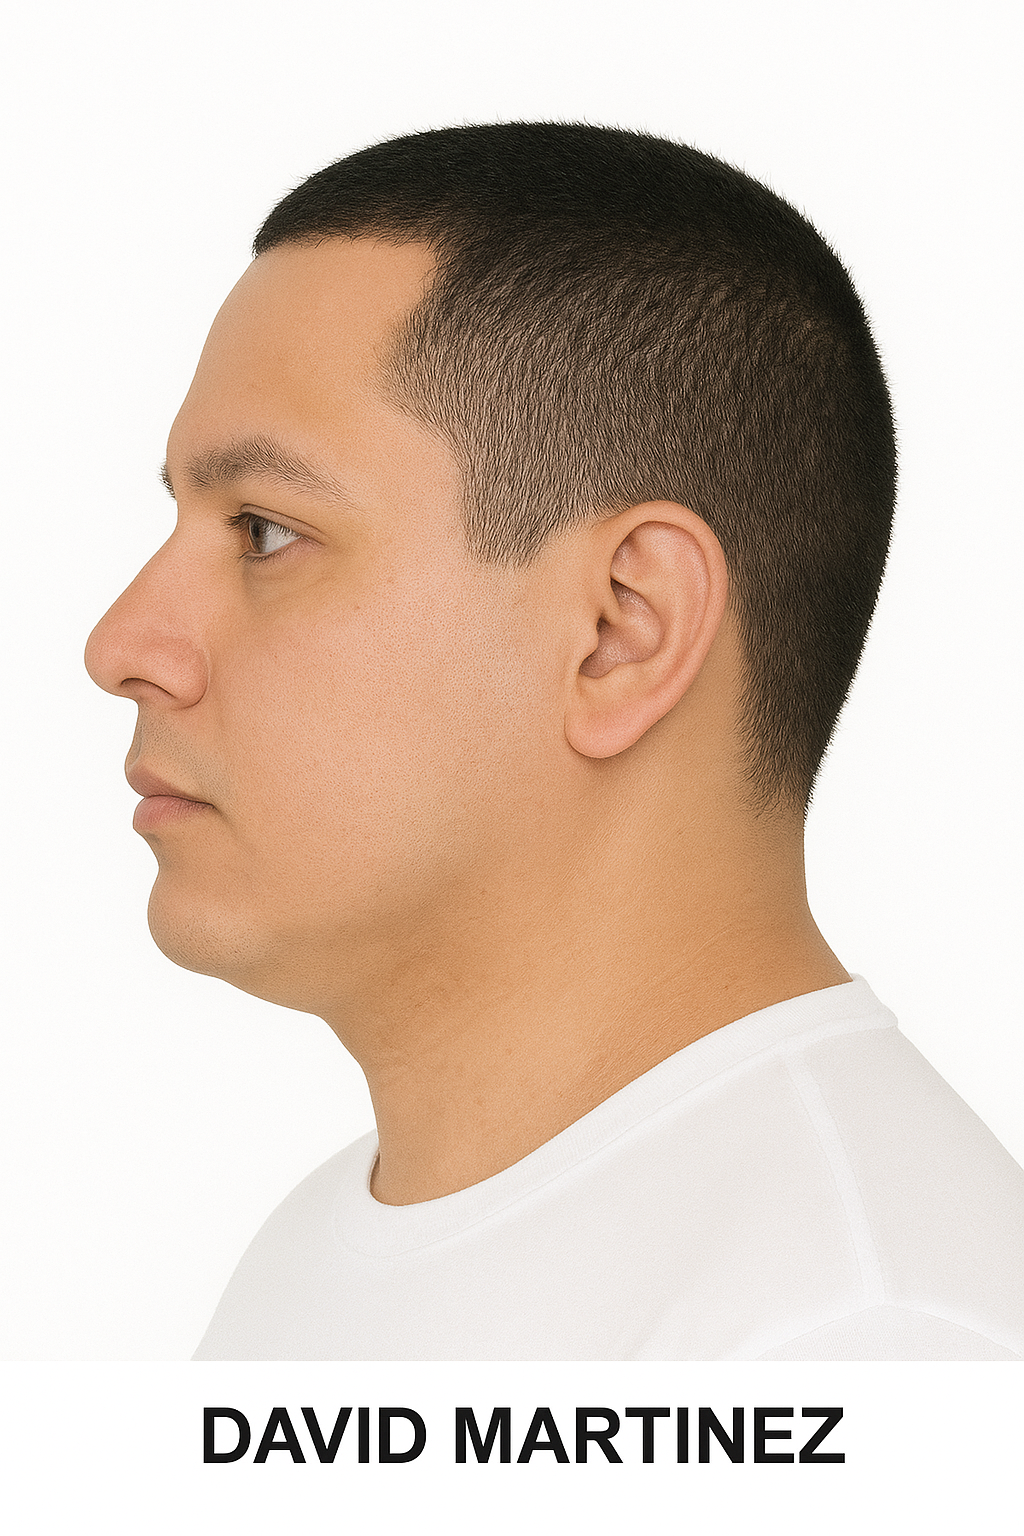
Portrait of a Latino man in his thirties named David Martinez, face in perfect side profile view (90-degree angle), looking straight ahead. Head-only composition with the entire head visible from top to bottom, including full hair. Completely flat, two-dimensional lighting with zero shadows, zero highlights, zero depth - as if photographed with ring light or completely diffused omnidirectional lighting. Every part of the face and head should have identical brightness with no tonal variation. Sharp focus throughout the entire head with no blur. Neutral expression, perfectly centred framing showing the full side profile, plain white background. Eliminate all shadowing. Clinical, forensic photography style with completely even exposure across all features.
Step 2: Creating UV maps
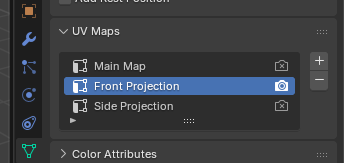
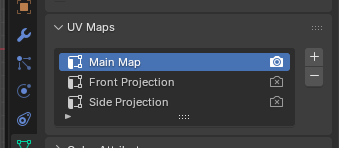
Create three UV maps. Front and side projection, and a Main Map (which will be a combination of the two eventually)

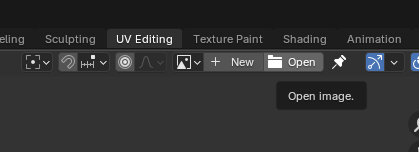
Go to UV Editing tab, open the frontal image create by ChatGPT
Select Front Projection in UV Maps
Select the right viewing panel and press num pad 3 to view the 3D model directly onwards.
Then press A (to select all) and press U and select Project from View.
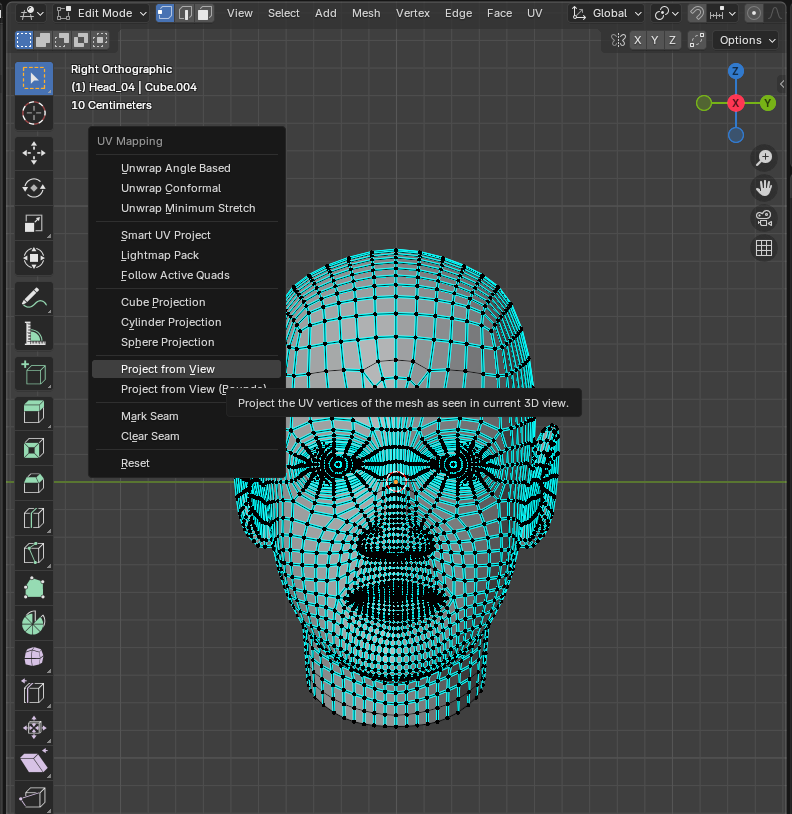
This will create a UV map in the shape in which you are looking at the 3D model.
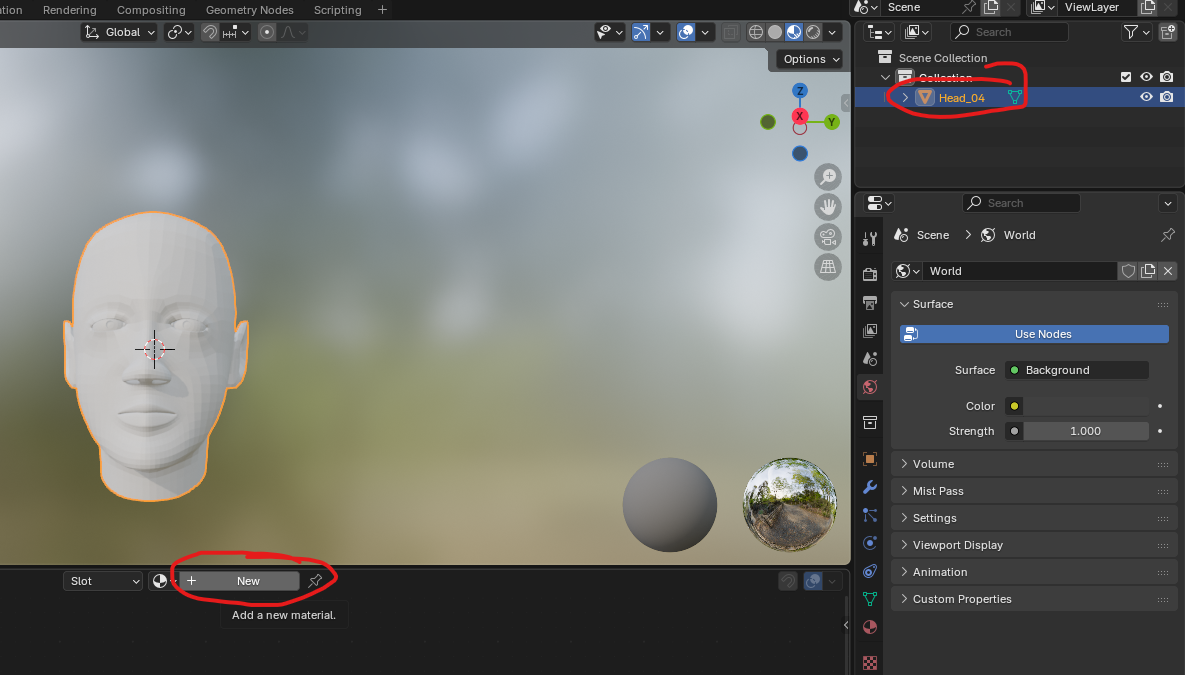
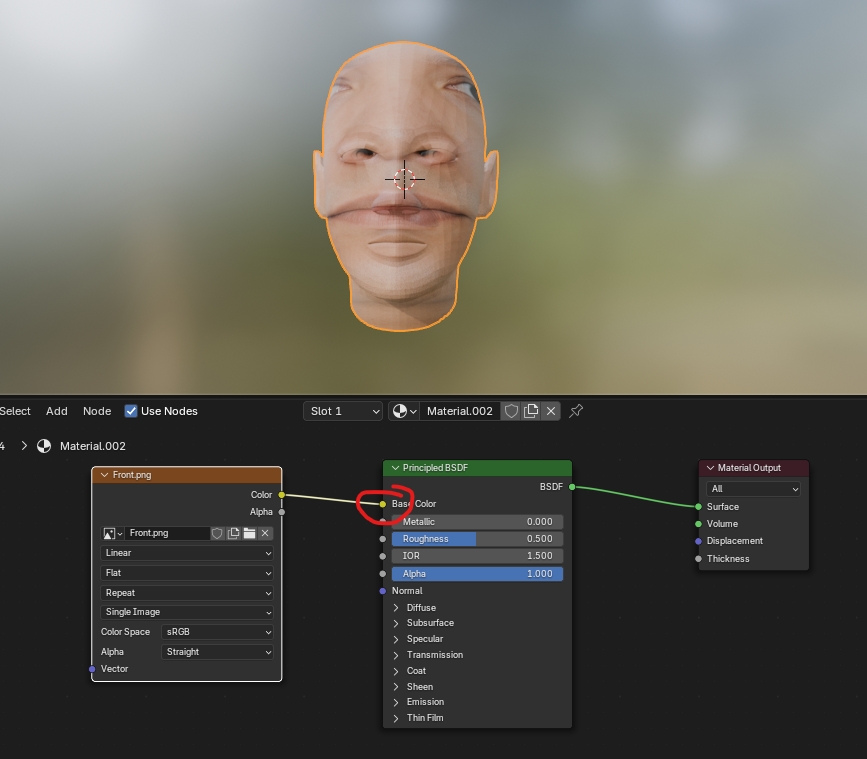
Step 3: Adding the image texture
Go Shading tab. Select the head in the scene collection at the top right. Create a new material.
Drag the yellow spot by Base Color, then select Image Texure > Color, add the frontal image texture. You should see the texture over the model.
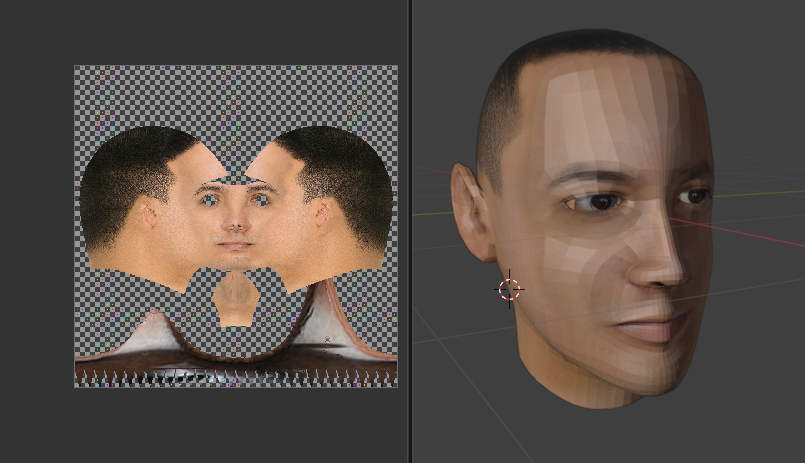
Step 4: Fitting the Front Projection UV Map
Go back to UV Editing tab. Click the right main panel and press A.
Now in the left panel, transform the UV map to fit the face. First scale it to roughly fit the face.
Then select Proportional Editing to move around specific parts.
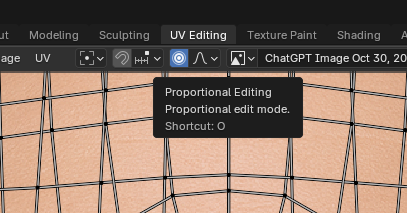
Selecting specific points and vertices, press G (scroll wheel to change the size) then move the mouse. Holding alt and shift, selecting lots of points and vertices can help to move whole parts. Check Texture Paint or Shading tab to see how its lining up. Rinse repeat until it all lines up satisfactorily.
If there is a way to do this so it's mirrored to the other side, I'd love to know.
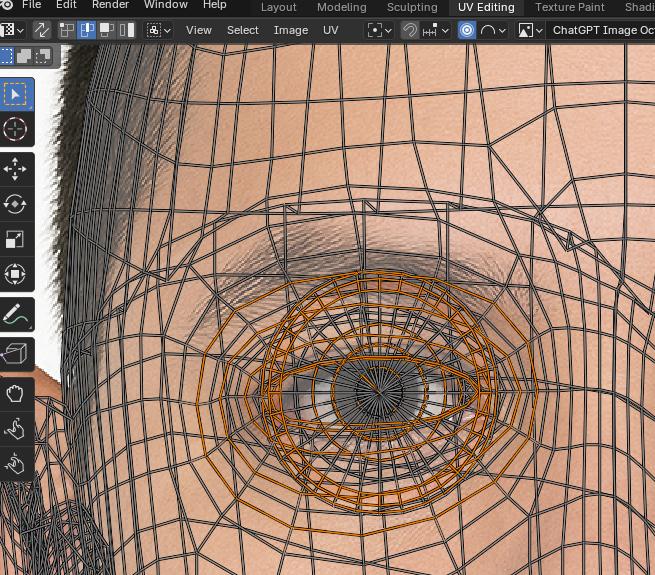
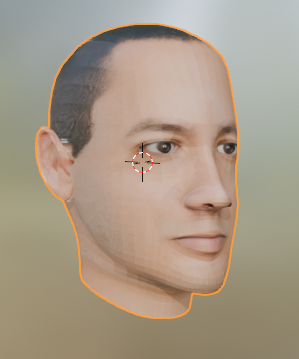
Eventually you'll get something that looks like this. Don't worry about anything other than how it looks front on.
Step 5: Fitting the Side Projection UV Map
During that last step, it was essential that the Front Projection UV map was selected at all times. Now we repeat the process except we select the Side Projection UV map instead.
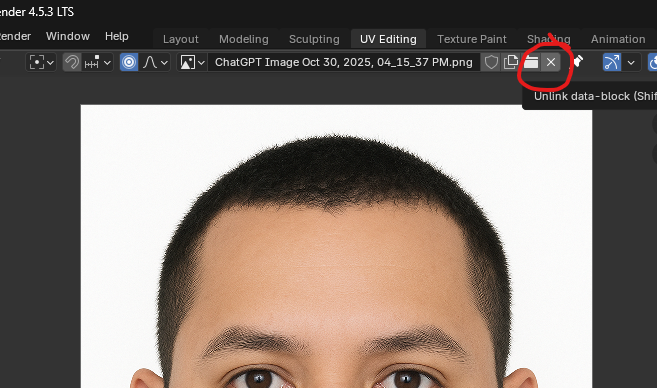
First close the front texture and open the side texture
Click the right panel, press num pad 3, then num pad 6 until the 3D head is side on. You can also use the X,Y,Z plane indicators to rotate it.
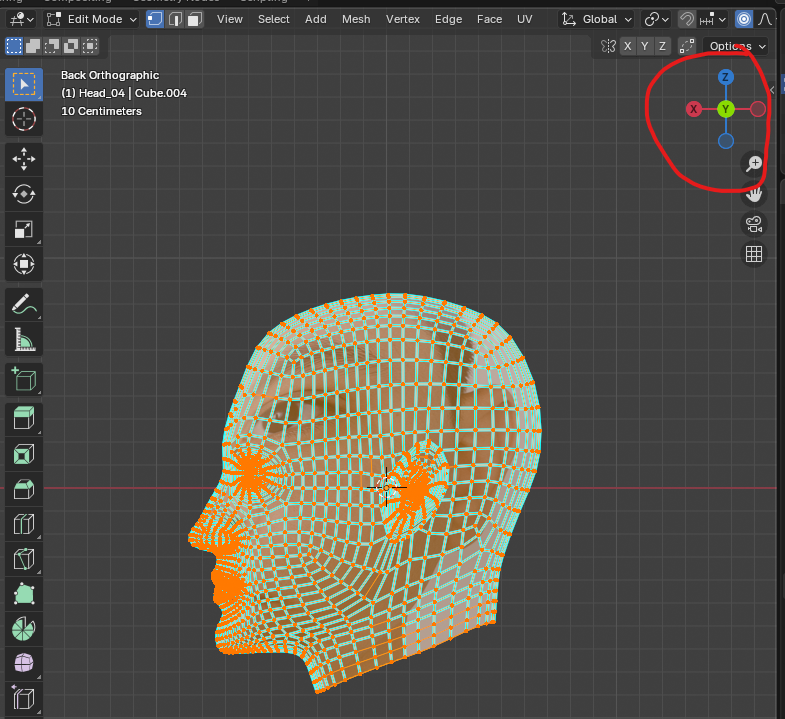
Press U and select Project From View.
Again transform the UV map to fir the face texture. Also load the side image in here to see how it looks while you're fitting.

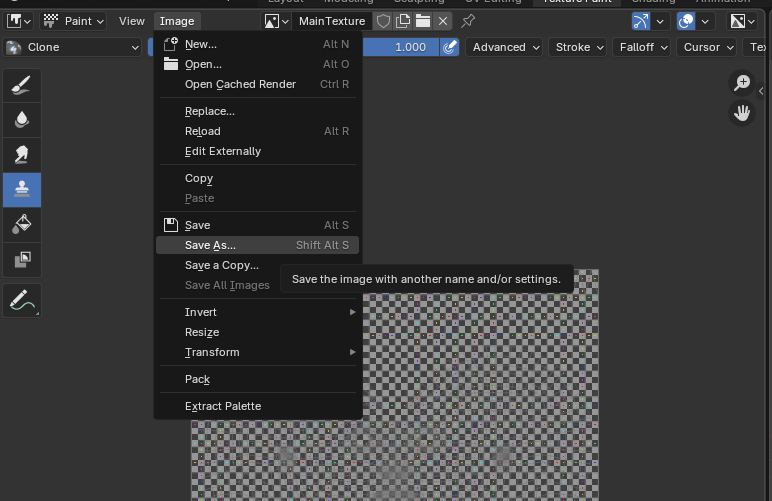
Step 6: Painting the face onto the Main Map UV map
(FYI I'm skipping a step here that is in the video. I'm not bothering to make the UV map cleaner. Seems like a pointless step)
Go to UV Editing tab. Make sure you have the Main Map selected in the UV Maps panel.
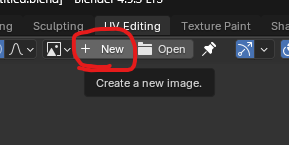
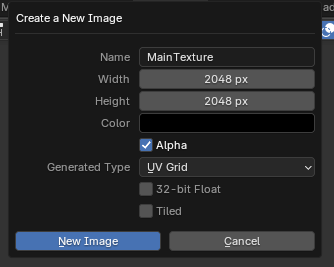
Then close the currently open image and create a new one.
Set it to this
Then go to Texture Paint tab
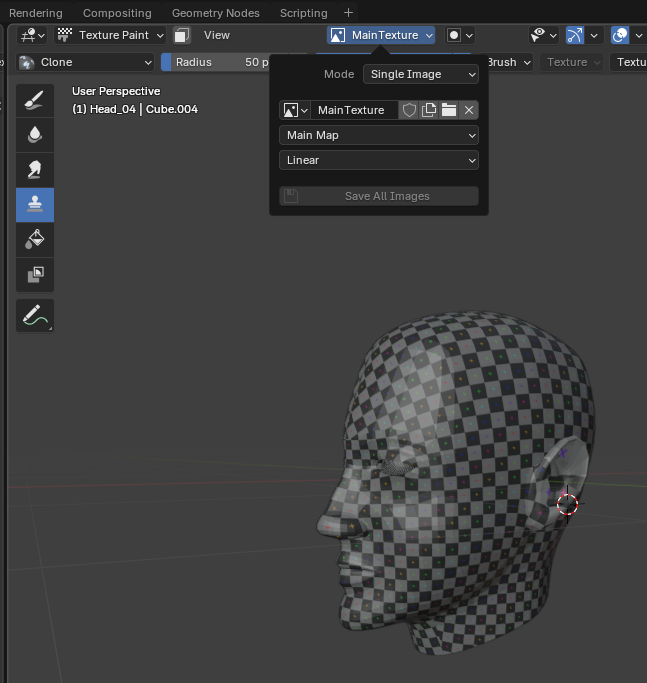
Get rid of the image on the left by clicking the X and open the MainTexture image that you just created. Then click Image and save the texture somewhere.
Then at the top of the right panel, select these (Mode as Single Image, MainTexture selected as Main Map, also clone tool)
In the clone tool settings, select Clone from Paint Slot and ensure an image is selected with its corresponding projection e.g. Front image for Front projection. Then paint it on!
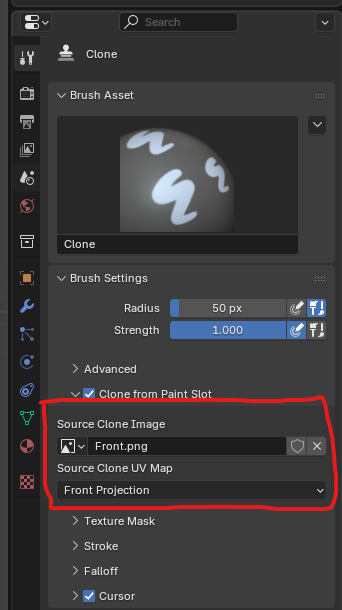
The textures behind the ears won't be right. Uncheck Clone from Paint Slot.
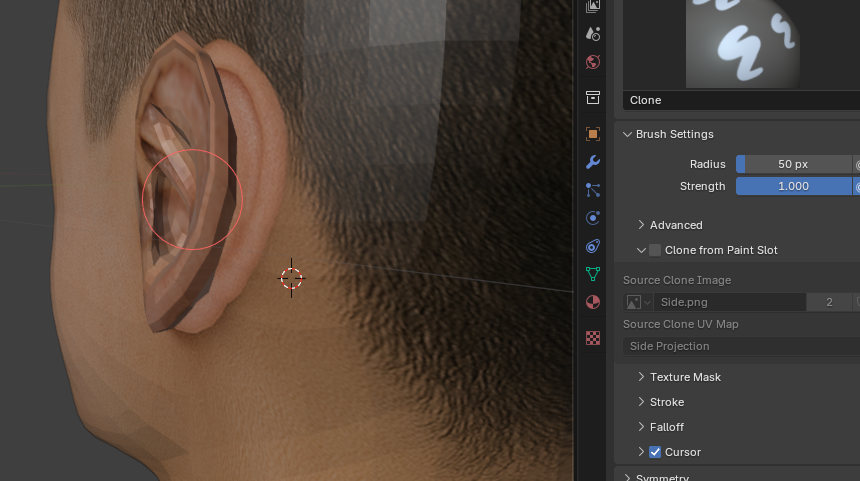
Press control + click to select a skin area (you are cloning from here), then left click to paint over the bad texturing.
And that's it!
Leave a comment
Log in with itch.io to leave a comment.